Search This Blog

Tutorials

Monday, September 29, 2014

It's costume time!

I have a confession, I have always loved making costumes.  I coerced my daughter into needing a costume this year.  A week ago I sent her photos of a couple of costumes I thought would be fun to make.  I told her she really needed a costume this year, right!?!  We got together on Saturday for brunch and afterwards I took her to JoAnn Fabrics to pick a pattern and fabric.  I am super excited.  This is the pattern I plan to make. (The short steampunk type one in the middle.  We chose a flocked black denim for the jacket and hopefully she will be able to wear it for more than just a costume.  Here is the Simplicity pattern we chose.

While we there we found some really fun fabric to morph my dog into a stegosaurus.  My first homemade pattern.  How did I do?  He still needs the head piece but I made this today.  It's lined with a very soft fleece so he doesn't seem to mind wearing it.  Isn't Mocha a good model, and he looks ferocious right?

I have had a class on Craftsy in my wish list for quite awhile.  The class teaches how to alter a pattern for a plus size body.  I finally decided to take this class because I really miss making clothes for myself. So, expect to see more clothing in the future.  I bought myself a jacket pattern too.

I did get an email saying my thread shipped this week.  I know I could have taken it off the frame and worked on something else but I was afraid it would end up in my pile of unfinished quilts and never get done.  In the meantime I pieced a back for my Craftsy Block of the month.  This is my own design too.

Have a creative day
Janet

Tuesday, September 23, 2014

No quilting, just piecing

Still waiting for my thread!

In the mean time. . .

Finishing up more UFO's.  This is from a Craftsy class, the 2012 block of the month.  I was using a Kaffe Fassett fat quarter bundle for the fabric, along with a tone on tone white for the background color.  I had two blocks left when I was down to tiny scraps and had to order more fabric. Setting it to the side while I waited was how this quilt ended up in 'the pile' of unfinished quilts.  I plan to piece the back in more of a modern style using my leftover pieces.  This one I don't even need to plan how to quilt.  Craftsy also has a class taught by Leah Day on how to quilt a sampler and more specifically this quilt.  I really admire Leah Day and think I will learn a lot from this class.

Here is another unfinished project.

I started this one at a retreat with Minnesota Contemporary Quilters.  I set it aside while trying to decide whether to keep it as a lap quilt or add a little fabric to at least make it fit a twin bed.  I decided last week when I pulled it out of 'the pile,' to make it a little bigger.  I wasn't sure if I would still be able to find the same fabric but luckily I knew the name of the fabric line, Urban Couture by Basic Grey for Moda.  I put it in a search engine and found exactly what I needed.  I ordered on Thursday and had the fabric by Saturday!  Amazing service!  Thank you to Nana's House Quilt Shop in Nashville.

After I finish piecing these two, fronts and backs, I am excited to start my next project.  I washed and pressed all the fabric so, I am ready to go.  This is for the Craftsy 2014 block of the month on color theory.  Aren't these fabrics amazing.

Have a creative day
Janet

Tuesday, September 16, 2014

One Block Wonder, so close!

I'm almost finished with my One Block Wonder, I was just ready to round the final corner when 'it' happened!  That moment we all dread, shudder.  I ran out of thread.  I knew it was going to be close and I started calling fabric shops a few days ago to see if they had this color.  No, no, no, no no!  I did finally find some online and placed the order last night.  Not sure how long it will take to get here.  I changed how I was doing the border which increased the amount of thread I needed.  Lesson learned?  Maybe.  I like to make mistakes several times to be sure I really learn what not to do.  Haha!

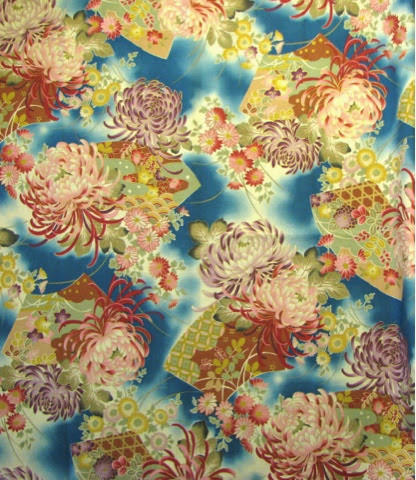
I decided I could give a little history of this quilt.  It all began with this fabric.

I signed up for a class at Bear Patch Quilting, it wasn't a lot of help for me as I forgot to go to the first class.  They tried to help me catch up in the second class but really it was better for me to read the book by Maxine Rosenthal called "One-Block Wonders". Here are my hexagons after much rearranging.

It hung on my design wall for quite awhile because I couldn't decide how to finish it.  I really liked one of the example quilts in the book, it just kept catching my eye.  I discovered in her next book "One-Block Wonders encore!", Maxine told exactly how to finish a OBW just like the example I admired in her first book.  And here it is

Now I had to figure out how to quilt it.  Who knew there were so many choices when making a quilt. Once again my poor little quilt sat, and sat in the stack of unfinished quilts.

I am trying to learn new techniques with each quilt. (new to me, not necessarily you).  I decided to go with stencils and chalk for this quilt.  I marked the entire border before putting it on the frame.  I used my bohin chalk pencil and it worked out great. Here is the stencil I used in the border.

I used this stencil for the flowers in the center.

And my circle rulers from Kim Brunner were very helpful with this quilt.

In the meantime, while waiting for my thread, I am finishing piecing my sampler quilt.  I plan to mark at least some of these blocks before I put it on the frame.  Lot's of new things to try on this quilt.  It still needs a border but otherwise I am finished piecing.

Have a Creative Day
Janet

Wednesday, September 10, 2014

Adding a Video

A friend of mine is wanting to add a video to her blog.  I thought I would walk myself through the process in order to help her out.  She is more creative than I am, as she wants to add her home video.  I am planning to link to YouTube.  I think the process should be the same.

The mystery quilt I added a few posts back had a section that was quilted using a design from Lyn Durbin.  The video is called "Quilting a Feathered Triangle w/ Curved Cross-Hatching."  I had planned to connect to the video when I blogged about the quilt but couldn't find the video again when I went back to YouTube.  I found it and now I am adding it to my blog so I don't lose it again.

The video upload button is right next to the photo upload button on your create new post page.  When you click this button a new pop up box appears, just like it does for photos.  The first choice is Upload.  This is probably the one you will use to add your own video.  (I say probably because you may have your video on your phone.)  You will need to know where you have your video stored on your computer.

The next two choices are for YouTube.  The first is 'From YouTube.'  The second is 'My YouTube Videos.'  I will be using from YouTube today.

The other two choices are from your phone and from webcam.  Blogger really does try to help those of us who like this process simplified.

When I clicked from YouTube a search box appeared and I entered the name of the video.  Once again I was unable to find the video this way but luckily I had the address for the video written down and I entered the address and clicked search.  My video appeared like magic!  Make sure it is highlighted by clicking on it and chose the Select button at the bottom of the pop-up screen.  Perfect! You now have a video inserted in your blog.  To find the address of a video click the Share button underneath the video on YouTube.  A whole series of logo buttons for different places on the web appear and under those is a window with the address already highlighted for your convenience.  Left click the address and chose copy from the pop-up window.  Paste this into the search window or type it in if you have it written down.

Have a Creative Day
Janet

Tuesday, September 9, 2014

Adding my flavor to a traditional quilt

I was hoping to have my One Block Wonder quilted by this post.

Almost done with the center so it shouldn't be too much longer.  It's garden harvest time at our house right now which takes away from quilting.  Today is tomato sauce and salsa day!  

Yesterday was apple pie, vegetable soup and bread bowl's.  I have never made a bread bowl before.  It was very fun.  If you click on this a new window will open with the recipe I used from chef in training.  I started following on Facebook and this recipe popped up one day.  

The next quilt to go on my longarm is a sampler quilt.  This one is also from the learning fiber arts group.  Quite a few members contributed to this, they would each tell how to make their favorite blocks.  Mine is very scrappy because I did it over a number of years with whatever fabric I had at the time.  I pulled it out a few nights ago because I knew I didn't quite have enough for a quilt yet.  I found I was only missing two.

I finished up those two blocks and had it strewn all over the floor when my son came home from work. I was trying to figure out how to tie it all together with the sashing.  Just could not figure out what color to use.  He looked at it and said, "Does it have to be one color?"  Light bulb moment for me!  Here is the result.  

Now for the corner blocks.  Julie suggested half square triangles for where the colors meet.  I think that will be perfect.  Any thoughts for the border?
Have a creative day
Janet

Wednesday, September 3, 2014

Old and new! Or old is new?

I'll start with something old.  Another UFO is complete.  This one is from 2008!  It started with a desire to learn how to make curves.  This is one of the techniques I tried.  I had two squares of fabric, layer them on top of each other and cut the curves.  I alternated the fabrics so I ended up with two curved pieces.

Around this same time I purchased a book by Susan Cleveland called Piping Hot Curves.  I thought my two curved pieces would work perfectly for this next step in my learning new skills.  I cut circles from one fabric and pieced them into the other adding piping around the edge of each circle.

A group online decided to have a round robin.  For this challenge we sent a center block and the next people added borders. Some very talented people added to mine.  Michelle Craig, Reneta Datzova and Julie Broderson, all from Learning Fiber Arts (a yahoo group), added borders to my block.

I'm glad I waited until now to try to quilt this piece because I knew less about quilting at that time than I did about curves and piping.  I really like the finished wall hanging.  Very cheerful.  Thank you Julie, Michelle and Reneta.


Now on to the "old is new".  I noticed my selvage basket was overflowing.

I have been saving selvedges ever since I discovered Selvage Blog.  I love the idea of taking something I would have thrown away and making something fun, functional and beautiful from it.

In the same online group(Learning Fiber Arts), Miriam had shown us how to make a bag using selvage fabric.  I took her techniques and used them with a pattern from Craftsy called Phoebe bag by Beki Lambert.

I had fun making this partly because I have been working on restoring my mom's old sewing machine. I managed to sew part of my bag on this machine.  The Singer still needs more work.  She started complaining part way through making the bag so I switched to my newer machine.  It was a blast from the past as this is the machine I used when first learning how to sew.

I like this bag.  It has an inside pocket and a magnetic snap closure!  Ooh, and the pattern is free!  Thank you Beki Lambert for wonderful instructions!  And thank you Miriam for teaching me how to use my selvage edges.  Lot's of fun.
On a side note. I had always thought it was spelled selvedge, not selvage.  For consistency in this post I spelled it selvage, but it really can be either way.  Fun fact.
Have a Creative Day!
Janet